So fall is knocking on my door.
The air is just a smidgen cooler.
Football season is here.
Grass doesn't need to be mowed (as much)!
Bathing suits are being retired till next year.
Baby Hancock (the first grandbaby in the family who will have this last name, grandbaby #14!!!) is due this month.
Windows can be left open at night.
Fall. Is. Coming!!!
So, what better way to celebrate than to add some fall colored accents around your home?!
Just about a month ago, I found pinterest (
Here's my "site"). Mercy. Have you seen pinterest!?! If not, you better not. It's just as bad a time-waster as facebook. Not kidding. Pinterest has been both good and bad though... Yes, I've wasted time on this website. BUT, I've also found ways to spend money that I don't have! Jackpot!!!
I kid - I have really and truly found ideas (recipes, kids games, quotes, DIY projects) that have proven to be valuable finds. In fact, these three recipes have been huge hits, and I'm sure to use them again and again:
1.
Honey Rolls from thepastryaffair.com
2.
Roasted Red Salsa from oneparticularkitchen.com
3.
Baked Parmesan Tomatoes from eatingwell.com
Yes. Pinterest and I are besties.
This brings me back to fall. It's almost here, and I could not be more thrilled! Pinterest has excited some pent-up (no pun intended!) creativity in me, and apparently all I needed was a little inspiration. In fact, these are the wreaths that I had in the back of my mind as I went shopping for the right supplies for the one I ended up making...
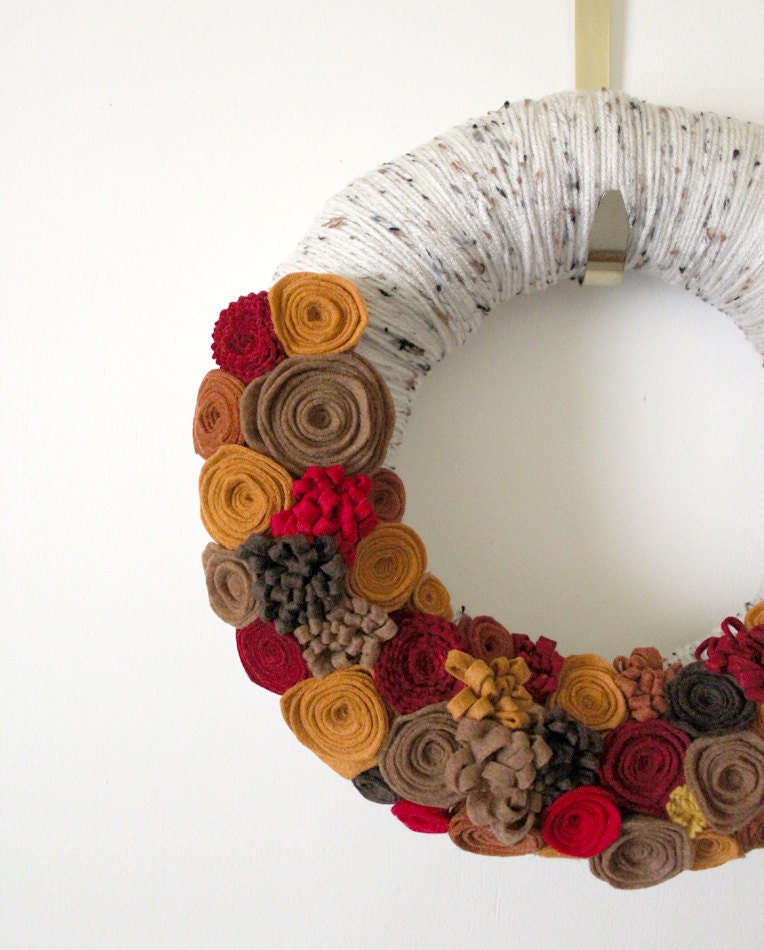
#1. Love this one. Love the colors. Love the textures. Link to original post
here.
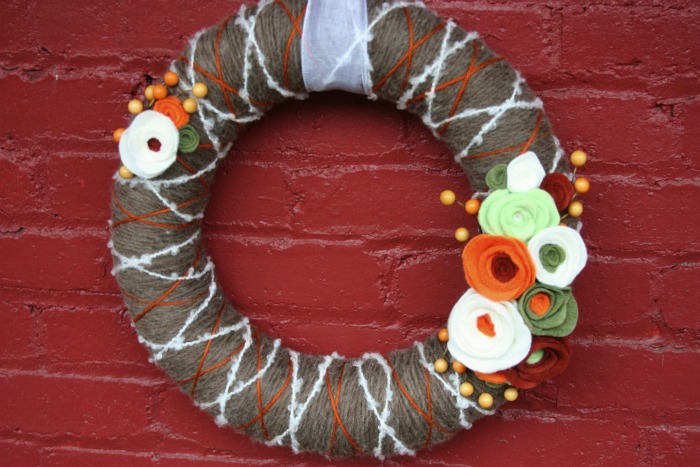
#2. And love this one too. Great colors, and I especially love how she made the "x" pattern on top of the first layer of single colored yarn. Link to original post
here.
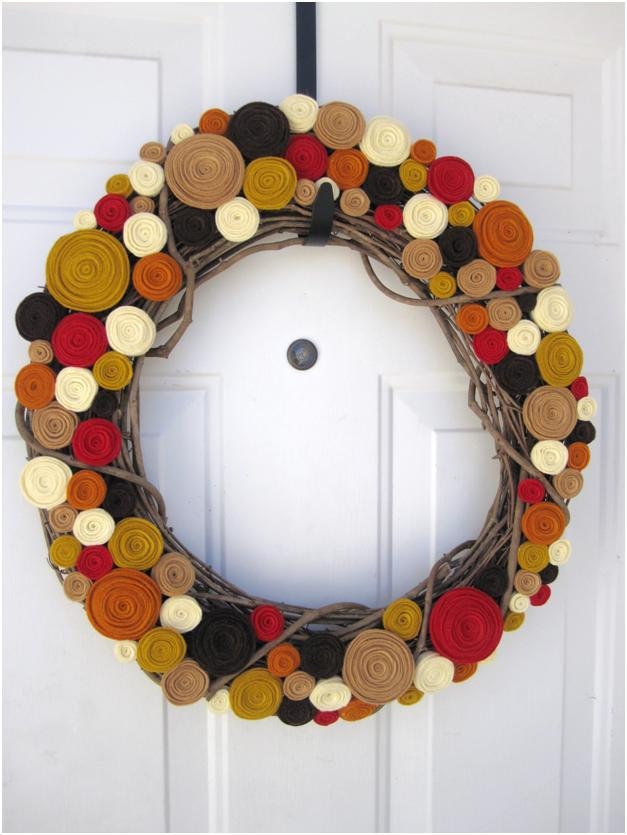
#3. And one more that makes such great use of fall colors. I'll be using this one for inspiration again, as I also bought a grapevine wreath that I'm just itchin' to embellish! Link
here.
Finally, here's a little tutorial for the wreath I just made to adorn my recently painted red front door (Color is named "Calico" in the Eddie Bauer line at Lowe's)... SUCH a good red... slightly bricky/brown/coral, but just a tad... not too much. Did I mention it's a great red?
Here are the supplies I used:
One 18" round form from Michael's. ($3.99)
Six fall colored skeins of yarn. (On sale, I paid $2.50 each at Michael's)
Six small sheets of felt, about the size of standard copy paper, but not exactly. (Sale price, $0.29 each at Michael's)
Hot glue, which I already had.
Masking tape, which I'll likely remove and hot glue those spots.
Grand total for $ is about $21.00, $15 of which was for yarn,
but I'm not even kidding when I tell you that those skeins look untouched. I could make a flippin afghan out of what's left! And I just might! Did I just say that?
I started by carelessly measuring (meaning, not exact...) about 3 lengths that my arms could stretch of all six colors of yarn, at the same time. I then kept them bundled and together, and started wrapping around the form. Sometimes I would twist a little, and sometimes not. I was going for a "free" look to the application, not too "stiff" or "perfect." As that length of yarn was done, I'd just start again with the same technique, until finally, after about 6 or 8 go's at it, the form was totally covered. These pics are of somewhere along that step:
Then, to embellish, I used felt flowers and various yarn "fixins." Here is a great tutorial on the
felt flowers (click here).
As for the yarn, to be totally honest, I just played with it. One fixin is just a large bunch of yarn (cut to about 9") tied in a loose knot. Three knots are placed side by side on my wreath, but that's just what happened today - No set "recipe" here, friends. Another yarn-y accent that I really like is the one that looks like a yarn doughnut (that has a gold felt flower placed in the center). I think that technique repeated several times on one wreath would look great. I'm going to have to make a video of me making that, because there's really no easy way to explain it. Another little "moment" on the wreath is a twisted mess of yarn, that just melted all onto itself. SUCH an easy technique. Takes 10 seconds.
I'm thrilled with how this little lady turned out. She makes me happy and makes me want to do more, just to hang inside and around my life. Maybe one for the van, one for the aerobics room at Granite Falls where I spend a few hours each week, one for being my computer monitor, cause I'd surely get a good taste of it there. ;)
Finally, a few more detailed shots, and a finished work. That's all, folks.